Hey there non-followers (and new real follower)! We’re almost done with this nonsense!
Last time, we got the vocals recorded, comped and tuned. Then we imported the tuned vocal back into our project and saved.
Now on to the last section, before we leave this topic for a while:
Preparing for the Mix
The very first thing I do when I have determined that I am not recording anything else–when the song is finished, the arrangement is more or less done and the I can’t think of any more cool parts to interlace in between the vocals, I open the File Menu, navigate to the Save As… dialog and save the project as projectname.mixprep.
In this case, it is Blogsong.mixprep.
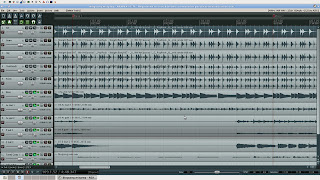
Now I can remove all the extraneous vocal takes and guitar takes and get down to the reality of the mix. As you can see, I have elimiated the original drum track, the MIDI track for the drums, the MIDI track for the bass.
Final Editing
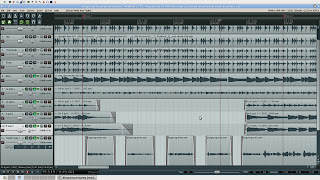
At this point, I start to chop away all of the unneeded material: the noisy beginning, where I’m waiting to play; and the endings, where the bass (and all of the other instruments, for that matter) needs to fade to silence.
At this point I start to really think about compression, EQ, reverb and what I’m trying to accomplish EMOTIONALLY in the song. From the over-arching EMOTIONAL content of the song, I will get ideas as to what the compression, EQ and reverb are supposed to sound like.
Adding Effects
There are plenty of free VST compatible effects that work well with REAPER in Linux. REAPER also comes with a lot of effects. I’ll show you the ones I use to get sounds.
One caveat though: if you’re used to using expensive proprietary effects that used iLok-style copy protection on Windows…get used to disappointment. Anything that required an iLok will not work in Linux through WINE…no matter how hard you try….no matter what crazy copy-protection hacking you attempt…trust me. There are many forum posts dedicated to the woes of trying to use iLok effects in Linux. In short…YOU CAN”T. Now stop whining and make some music…
The scope of this post is to get a good basic balance happening…not an actual MIX (with automation and fancy bells and whistles).
So here’s how it tends to happen for me:
Drums
I usually start with the drums. I use the Compressor that comes with REAPER and a little of the EQ that it also comes with to get something that really starts to resemble a Kick Drum, a Snare Drum, the HiHats and the OverHeads.
Like so:
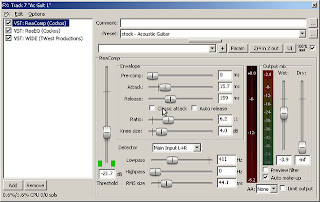
Kick Drum Compressor:
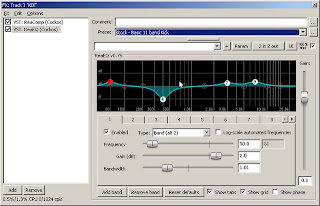
Kick Drum EQ:
For the rest of the instruments in the drum kit, I’m basically using these same two plugins over and over again. REAPER makes it a little easier by having presets for each instrument that sound pretty good, but they ALWAYS require a little extra tweaking to get them to sound right in context–this is NEVER a “set it and forget it” type of a situation.
Bass
Again, I’m using the two REAPER-supplied staples most of the time. Let me stress that this is just for a good balance that I can put on my iPod to listen to for a while before I actually go in to do a FINAL mix.
And again, I’m starting with the appropriate Bass preset and tweaking it a little so that it fits well with my other tracks.
Electric Guitars
Next come the electric guitars. You guessed it: still using the built in compressor and EQ. Sometimes I use a stereo widener, depending on what I need these guitars to do. I also treat the guitars slightly differently, with slight differences in the EQ shape and the compression attack and release.
I also pan them to some degree. When panning, I think about whether I need the Vocal to be intimate or not-so-intimate, and whether there needs to be a sense of space in the middle of the mix or not. In this particular song, I’m panning the electric guitars hard left and right (to get them out of the way and to leave the middle open for the vocals and acoustic guitars).
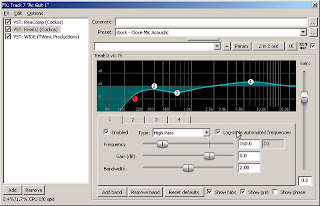
Here are the effects on Electric Guitar #1:
The effects on Electric Guitar #2 are similar, but the EQ has more low mids boosted.
Acoustic Guitars
For the acoustic guitars, I’m using…yeah…the built-in compression and EQ with the acoustic guitar presets tweaked a bit to fit the song.
Also, naturally, each guitar is treated seperately, so there are slightly different settings on each guitar–a little faster attack on one, a little bit of a different EQ curve on another.
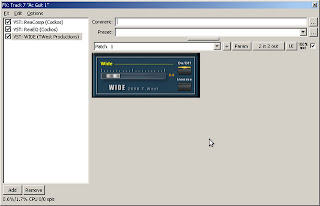
The thing that these two guitars share is a free stereo-widening plugin called, oddly enough, WIDE. I use this preset exactly the same on both guitars. It adds a nice “wideness” to the stereo image of each guitar. Makes the sound of the acoustic guitar to seem wider at the edges–like the sound is emanating from somewhere slightly to the outside of your speaker placement.
So here are the effects on Acoustic Guitar 1:
Compressor:
EQ:
And Stereo Widener:
For the second acoustic guitar, basically all that changed this time is the EQ curve. I won’t bother showing you a screen shot, the EQ just has a little bump at about 10k.
Vocals
For the vocals, you may remember that I applied the effects at the end of last week’s post, but I never told you which effects I applied.
I applied them at the end of the vocal editing so I could hear what I was working with.
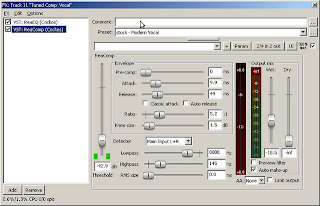
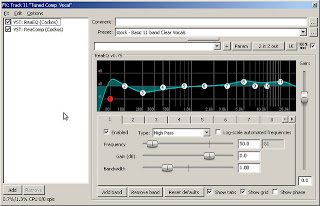
I’m sure you could guess which effects I am using for this rough mix…yep…REAPER’s compressor and multiband EQ again:
Sometimes, depending on the track, I use a free VST de-esser plugin from digital fish phones called Spitfish to tone down some of the sibilance in the vocal track. The vocals on this particular track were ok. No de-essing needed.
Reverb
For this rough mix, I’m not too concerned about any crazy awesome reverb layering and tuning. I’m just concerned with putting a general reverb on the band to make it seem like these virtual people are playing in the same room…together. I also put a little reverb on the lead vocal just to differentiate it from the rest of the band. Doing the reverb this way is good enough to listen to for a bit while you plan what you’re going to do for your REAL MIX…
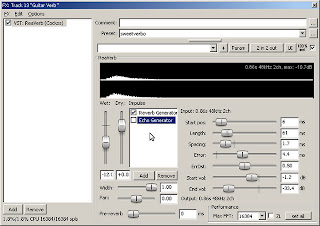
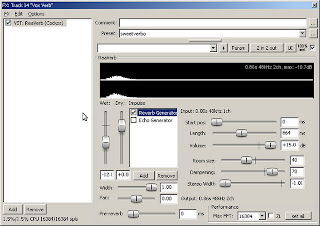
One of the cool things about REAPER is that any track can become an auxillary track just by way of routing. I make two tracks, one for Band reverb and one for vocal reverb. Then I send all of the tracks that aren’t the vocals to the “Band Reverb” or sometimes “Guitar Reverb” track and use–you guessed it–the built in REAPER reverb with its “sweetverbo” preset. I set the room size to about 75 ft. I also do away with the early reflections that come form the “Echo Generator” section of the preset…I just don’t think they sound all that great.
For the vocal reverb, I use the same preset, but I change the room size to 40ft.
Final Balance
From there, I just try to set the levels where they should be for the whole song. This is a ROUGH MIX. Its purpose is to give me something to listen to that I can use to plan the FINAL mix…complete with cool effects, cool panning moves, cool automation and a lead vocal that sits where it needs to sit throughout the song. So here I’m just trying to get everything to sound…well…balanced.
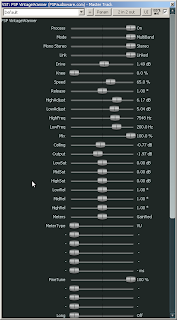
I also like to use a compressor across the master fader. I use PSP’s Vintage Warmer. Again, because I’m using it in WINE in LInux on an ANCIENT computer with no 3d acceleration, the normal interface looks like this:
So…I have to use the alternate user interface that looks like this:
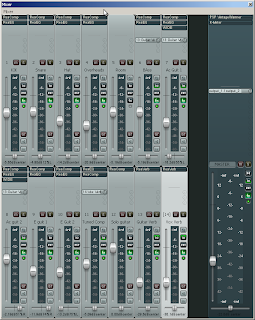
Here’s what the mix window looked like when the balance was where I wanted it this time:
So there you go. My demo process. In five parts. Usually I can get all of this done in about one week, from writing to this stage (Mixing is a whole other animal). I think next week we’ll get back to some songwriting issues…you know, all that stuff that comes before you press record.
This Week:
Been playing more with Musescore notation software. It’s a really nice open-source software package.
I’ve also been threatening to do some guitar transcription. Been learning a Robben Ford solo using Play it Slowly. It allows you to play things back at any rate, but still keeping the pitches in the correct register.
Read The Dead and the Gone . Gotta love post-apocalyptics!
Been listening to The Homemade Hit Show. It can be inspiring.
Jason Isbell and the 400 Unit
Robben Ford, apparently.
See you next week, for something about…songwriting.
